
DIY Wooden Dinghy Construction: Build a Small Boat with Ease
Embarking on the journey of building your own wooden dinghy is a rewarding and fulfilling experience. It's a chance to connect with traditional boatbuilding methods, create a unique and personalized vessel, and enjoy the satisfaction of crafting something with your own hands. This comprehensive guide will lead you through the process of constructing a small wooden dinghy, from design and materials selection to assembly and finishing.
Choosing Your Dinghy Design
The first step is to select a design that aligns with your skill level, intended use, and available resources. Several excellent dinghy plans are available online, in boatbuilding books, and from specialized suppliers. Consider these factors when making your decision:
Size and Capacity
The size of your dinghy will determine its carrying capacity and overall maneuverability. Smaller dinghies are ideal for solo paddling or rowing, while larger ones can accommodate more passengers and gear.
Hull Shape and Type
The hull shape influences the dinghy's stability, speed, and performance. Common hull types include:
- Skiff: A shallow-draft, flat-bottomed design suitable for shallow waters and beaching.
- Sharpie: A slightly more pointed bow and wider beam for better stability and carrying capacity.
- Dory: A traditional design with a wide, rounded bow and a flared stern, providing excellent stability and seaworthiness.
Construction Method
Dinghies can be built using various construction methods, each with its own level of complexity and required tools.
- Strip Planking: A popular method involving laminating thin strips of wood over a strongback frame.
- Plywood Construction: Utilizing pre-cut plywood panels for the hull, making it faster and easier for beginners.
- Carvel Planking: Traditional method where planks are laid edge-to-edge and fastened to the frame.
Selecting Materials
The quality of your materials directly impacts the durability, longevity, and overall aesthetic of your dinghy. Choose materials that are suitable for marine applications and meet the specifications outlined in your chosen plans.
Wood
For traditional wooden dinghies, common wood species include:
- Cedar: Lightweight and naturally rot-resistant.
- Mahogany: Durable and attractive, often used for high-end boatbuilding.
- Oak: Strong and resistant to warping, but heavier than cedar.
- Plywood: Marine-grade plywood is a cost-effective and versatile option.
Hardware
Hardware components are essential for the dinghy's structural integrity and functionality. Essential items include:
- Fasteners: Marine-grade screws, bolts, and nails.
- Epoxy Resin: For bonding wood and sealing seams.
- Fiberglass Cloth: For reinforcing seams and areas of stress.
- Oars or Rowlocks: For propulsion.
- Thwarts: Seats or crossbeams for the rower(s).
Construction Process
The construction process will vary slightly depending on the chosen design and method. However, it generally follows these steps:
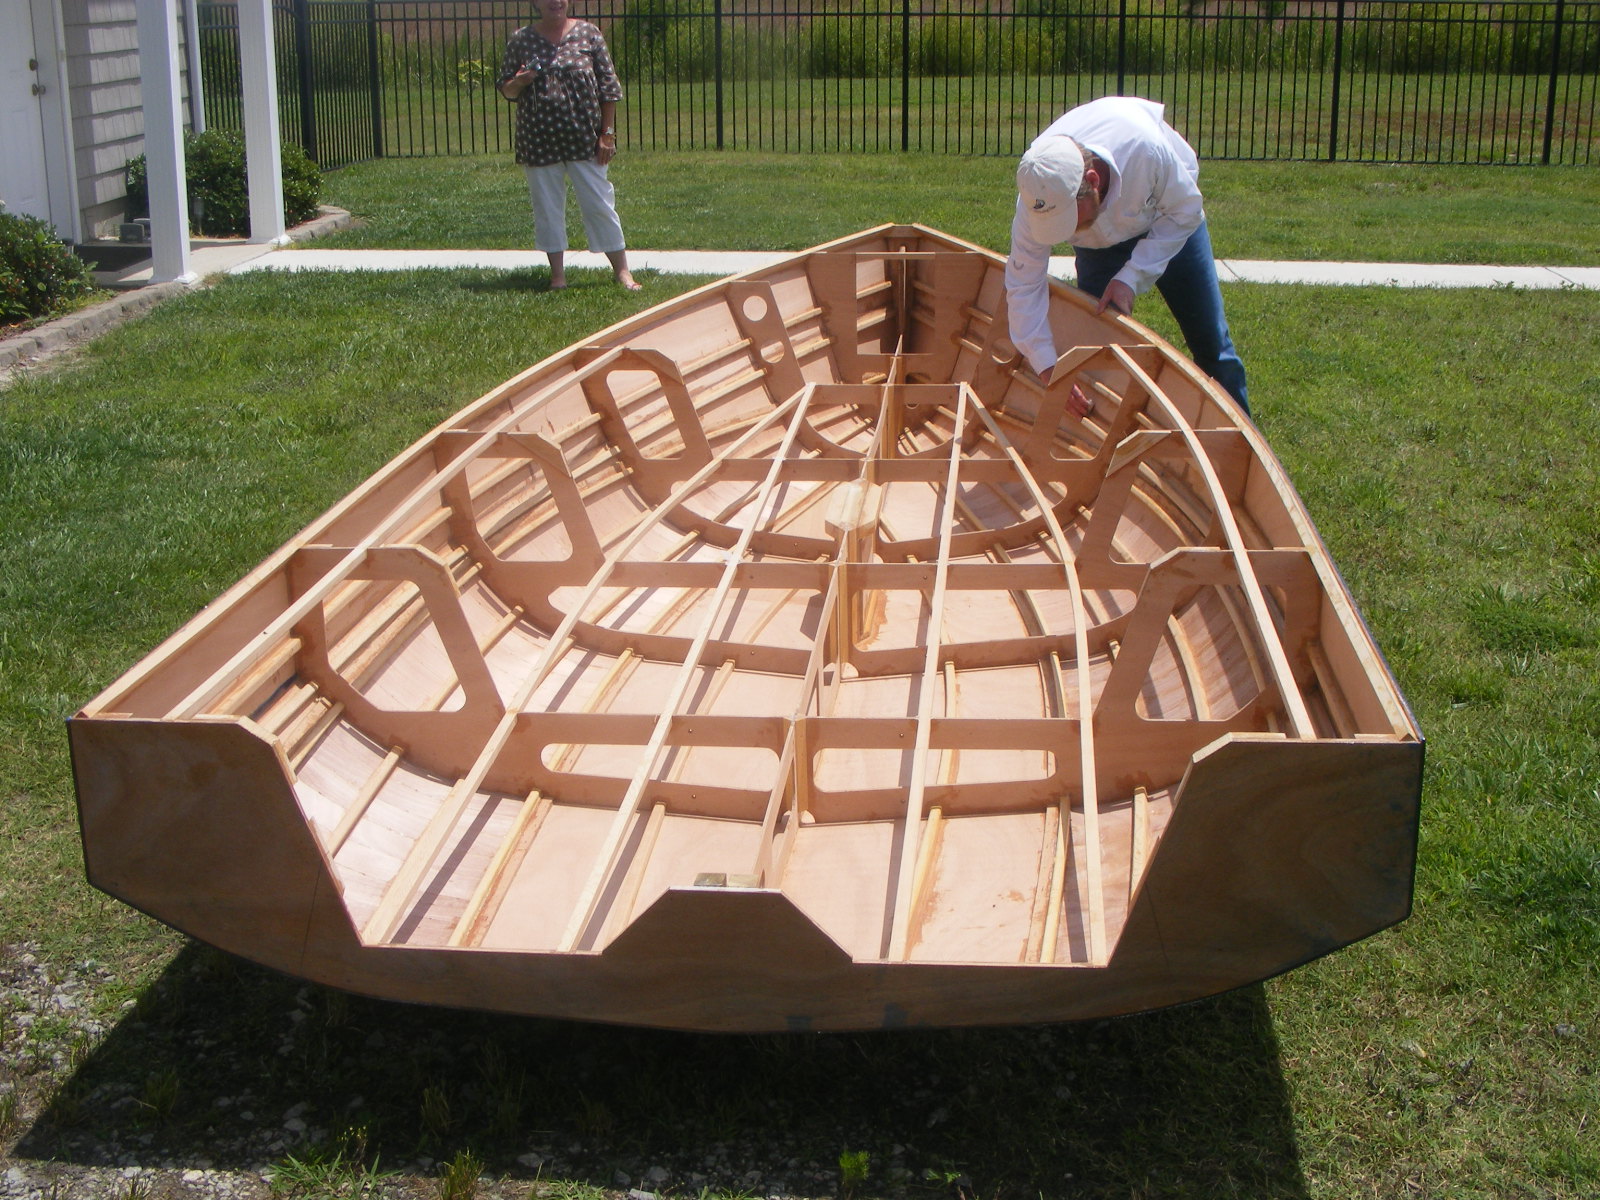
1. Building the Frame
The frame provides the skeleton of the dinghy. This involves cutting, shaping, and assembling the keel, stem, sternpost, and ribs using your chosen joinery techniques. Carefully follow the plans and use precise measurements for optimal results.
2. Planking the Hull
Planking is the process of covering the frame with planks of wood. This is where your chosen construction method plays a significant role. Follow the planking instructions diligently, ensuring proper spacing and alignment.
3. Sealing and Reinforcing
After planking, seal the seams and joints using epoxy resin and fiberglass cloth. This provides a waterproof barrier and strengthens the hull.
4. Installing Hardware and Finishing Touches
Once the hull is fully sealed and cured, you can install hardware such as thwarts, oars, and rowlocks. Finish the dinghy with paint or varnish for protection and aesthetics.
Safety Considerations
Building a wooden dinghy requires careful attention to safety. Always wear safety glasses, gloves, and a dust mask when working with power tools and wood. Follow the manufacturer's instructions for all tools and materials, and work in a well-ventilated area.
Finishing Touches
The finishing touches add the final details and personality to your dinghy. Consider these options:
Paint or Varnish
Choose a marine-grade paint or varnish that provides protection from water, UV rays, and weathering. Apply multiple coats for optimal durability.
Decorative Elements
Add your own personal touch with decorative elements such as nameplates, rubrails, or custom paint designs.
Launching Your New Dinghy
Once your dinghy is finished, it's time for the exciting moment of launching. Take your time, double-check all connections, and enjoy your new creation on the water.
Conclusion
Building a wooden dinghy is a journey of craftsmanship, patience, and pride. By following the steps outlined in this guide and using high-quality materials and techniques, you can create a unique and functional vessel that you'll enjoy for years to come. Remember, the process itself is a rewarding experience, and the final product is a testament to your skills and dedication.
0 comments:
Post a Comment
Note: Only a member of this blog may post a comment.